I found this little table, lonely, in the rain, by the side of a road in our neighborhood. Someone had just thrown it away.

Now it has a whole new look…

Totally free table transformed. So how did this ugly duckling become a swan? Turns out all that was needed was some elbow grease and TLC.
First, I cleaned the table. I noticed that two of the corners were a little loose.

After trying to hammer them back into place (and failing), I put some wood filler in the spaces and then sanded the whole table down.
Once sanded and wiped down again, I was ready to paint. I had a sample of Annie Sloan Chalk Paint in Louis Blue from the Haven Conference last year – it was the right color and amount for the job. I used two coats of polyurethane (clear satin) on top of the paint, sanding lightly in between coats of poly.

Thank you, Holly at Storywood Designs, for helping me with all my questions about using Annie Sloan Chalk Paint! (P.S. Check out her super awesome blog if you haven’t. She is one talented friend o’mine.) Holly warned me that the poly might take off some of the paint; thus, I didn’t distress the paint too much before the first coat of poly. She was right – the sanding took off some of the paint and created a little bit of a distressed look.
Next, it was time for the top.
I had it in my head that (a) this project was going to be totally free – all products upcycled or recycled in some say; and (b) I really wanted to use a rag rug on top. I saw someone create a footstool with one, and I thought it would be a great, colorful top for this table, too.
And I had a rag rug in my closet that I hadn’t used in eons and thought it’d be perfect for the job.
I laid the rug on the floor and put the table upside down on top. I attached the rug to the underside of the table with a staple gun, and I hot glued the edges of the rug to the bottom of the table.


I stapled each side to the underside of the table, then flipped the table over to admire my work so far.

Hank admired it, too. He supervises really well.
After adding staples around the edge of the rug on the other sides of the table, I decided that the staples, while not really visible, still should be covered.
Then I remembered…
Rag rugs are made of, well, rags.
I took the scraps that were left and pulled the blue rags out.

I attached the rag “trim” with a hot glue gun.

I did this all around the perimeter of the top.
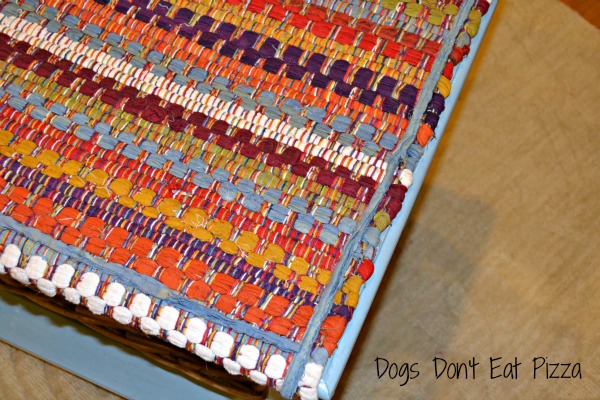
Finally, the finished (well, almost) table!


All that’s left is to get a glass top for it, or I could just cut down a piece of plywood and attach it to the table top, underneath the rug, as support. I had thought that I could pull the rug taut enough that it would be enough support for a table or stand, but it really isn’t. The rug is just too flexible.
Either way – with either glass or plywood as support – it’s an original piece that, so far, has cost me nothing but a few hours.
UPDATED: Here is the post where I fixed the sagging rug top, adding support with belts!
Thank you for stopping by!


Leave a reply to karen@somewhatquirky Cancel reply