Good Monday morning!
Usually, when I have a project I want to complete that involves a mess, I use the kitchen table or the garage. But this ends up being problematic, because (a) I don’t want to get paint, glue, whatever on the rug in the breakfast room; (b) I have to move the project if it’s mealtime; and (c) the garage isn’t so warm in the winter!
I wanted and needed my own creative space.
Our guest room has my desk in it anyway, and it also has this wonky little alcove by the closet. The alcove seemed the perfect place for a little creative area.
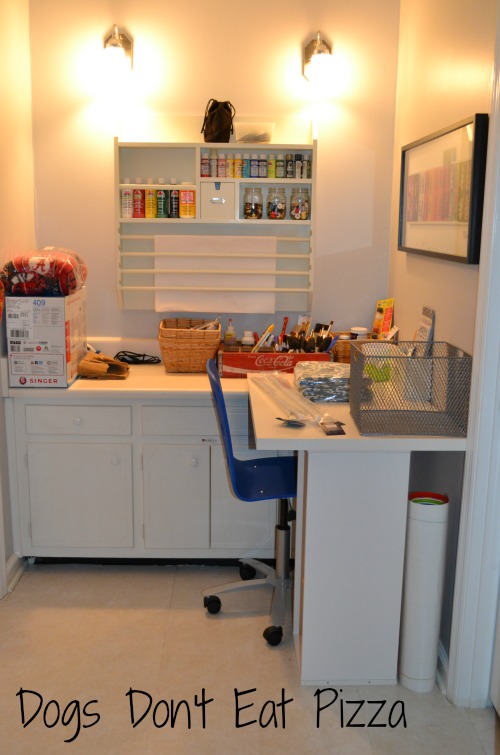
Without further ado, here’s my new work and craft area!!
It’s perfect for me. It’s bright, and has a mixture of old stuff (the Coke crate) and bright, modern stuff (the Matisse print). Happy.
And it didn’t cost me anything (other than time) because I used what we already had! Score!
But it wasn’t easy…
Step 1: I had to empty the space.
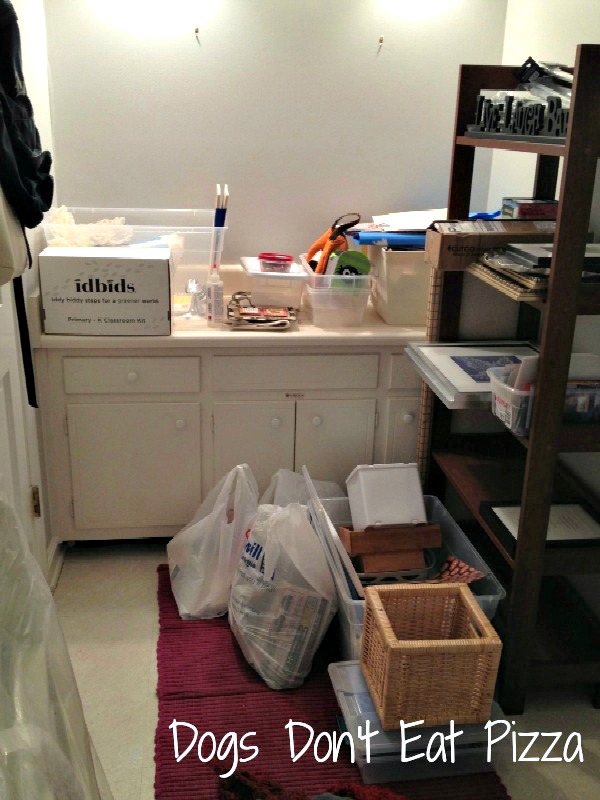
The guest room generally, and this space specifically, is usually our dumping ground for stuff we don’t know where else to put. Here are some “before” pics:
So the first step in this project was clearing out that area and figuring out where to put all that stuff if it wasn’t going back in the craft/work space. Here’s what it looked like once I emptied the space:
Of course, once I emptied it, here’s what the rest of the guest room looked like (oy):
Just had to remember that mess = progress.
Step 2: What to do about the vanity.
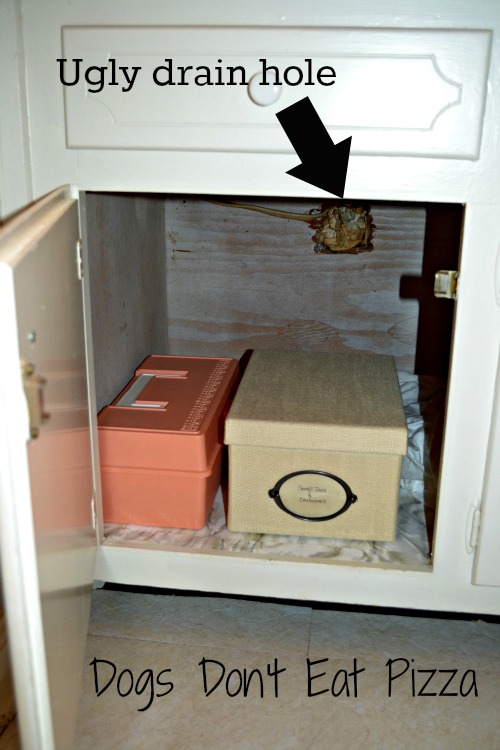
As you know from this post and the picture above, there’s a vanity against that back wall. To tear it out or not to tear it out…that was the question.
Ultimately, I decided not to tear it out, for three reasons: (1) it would have inevitably meant some drywall repair, and I wanted this project to be finished this weekend; (2) the vanity has two holes in the back of it: a pipe opening and a hole that has the electrical/plug behind it. It was never plumbed, but the pipe is sticking out a bit and it is ugly.
Didn’t want to deal with that. And (3) the floor – under the white tile that’s there now is gold speckled linoleum. Did NOT want to deal with that, either – at least not now. So, the vanity stayed. It does have this cool tag on it:
So, I decided I had to work with it, which was a bit problematic. Which brings me to…
Step 3: Creating the work table.
I had a table from Ikea that I wanted to use as my work table, but it wasn’t the same height as the counter of the vanity. I decided to make the work space an “L” shape, so I needed to rest the table on the vanity to create the L.
The legs of the table didn’t work because they were too short. So, I had to get creative.
I tried bookcases. I tried tables. And then…
I moved a shoe rack!
Huh?
Well, I had, in our donation pile, an old shelf unit that we used for shoe storage.
When I cleared out the alcove, I had to move this out of there. When I turned it on its side, I realized that I could make a box out of it, and use it as the support for the table. And, as luck would have it, it was the PERFECT height!
Anyone who thinks that DIY isn’t a logic game isn’t doing it right.
I used the pre-drilled shelf holes to screw the box/shoe storage to the table top:
And voila!
Work area complete! Now we need the good stuff!
Step 4: Craft and supply storage.
I was lucky and found this Pottery Barn craft organizer on Freecycle for, you guessed it, FREE! It was new, in the box, never opened! Crazy.
It was perfect for the space.
It holds the big stuff, as well as some tissue paper.
And now for the vanity top. I found an old Coke crate at a furniture consignment store a month or so ago, and was just using it as decoration. I thought it would make great storage for brushes, paint pens, scissors, etc.
I used one of the containers from the craft organizer for stencils and labels:
Even the shoe organizer/box support became a good hiding place for the trash can!
I’ve already put some projects in the area…ready to start working on them.
So, there it is, friends. My new work and craft area. I still have to finish organizing the closet (I can’t believe I’m showing you this):
I use the closet for storage (duh) of supplies and home decor (I love “shopping” in my own house!). Still have to tackle that and the rest of the guest room.
But I’m really happy with the craft and work area.
And I love how I could use what we already had, so the cost was just the time in gathering and putting it all together! Bonus!
Linking up at:
Thanks for stopping by!


Leave a comment